Mizutani Laboratory
Dept of Applied Biochemistry, School of Engineering, Tokai University
Home -
Movies/3D models -
Publications -
MCTrace -
RecView
 -
3D test patterns
Three-dimensional test patterns for micro-CT and nano-CT
In order to estimate the spatial resolution of 3D images taken with microtomography (micro-CT) or nanotomography (nano-CT), we use test objects on the submicrometer to nanometer scale prepared by focused-ion-beam milling (FIB). The resolutions along the direction within the tomographic slice plane (in-plane or transverse resolution) and perpendicular to it (through-plane or sagittal resolution) can be determined from their square-wave patterns. The aluminum test patterns are labile in the air when it's stored for a long period, such as over one year. If possible, they should rather be stored in a vacuum chamber.
Micrometer to submicrometer patterns
Test pattern 080425AL
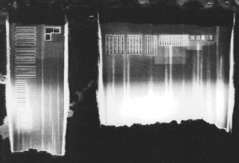 Material: aluminum wire, 0.25 mm diameter.
Pattern pitches: 2.0, 1.6, 1.2, 1.0, 0.8, 0.6, 0.5, 0.4, 0.3, 0.2 um.
Resin embedded.
Test pattern 080604D1
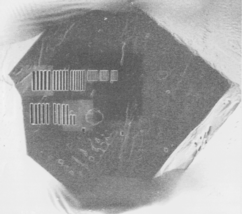 Material: diamond, ca. 0.15 mm crystal.
Pattern pitches: 2.0, 1.6, 1.2, 1.0, 0.8, 0.6 um. In-plane only.
Nanometer patterns
Test pattern 130315AL
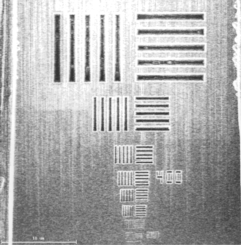 Material: aluminum rod, ca. 0.12 mm square.
Pattern pitches: 2.0, 1.0, 0.5, 0.40, 0.35, 0.30, 0.25, 0.20 um, 180, 160, 140, 120, 100, 90, 80 nm.
Test pattern 130524AL
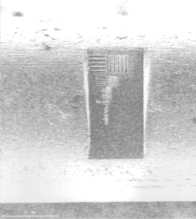 Material: aluminum wire, 0.10 mm diameter.
Pattern pitches: 2.0, 1.0, 0.5, 0.40, 0.35, 0.30, 0.25, 0.20 um, 180, 160, 140, 120, 100, 90, 80 nm.
References
- R. Mizutani, A. Takeuchi, R.Y. Osamura, S. Takekoshi, K. Uesugi and Y. Suzuki (2010). Submicrometer tomographic resolution examined using a micro-fabricated test object. Micron 41(1), 90-95.
DOI
PubMed
arXiv
- R. Mizutani, K. Taguchi, A. Takeuchi, K. Uesugi and Y. Suzuki (2010). Estimation of presampling modulation transfer function in synchrotron radiation microtomography. Nuclear Instrum. Meth. A 621(1-3), 615-619.
DOI
arXiv
Document
A PDF document of these test patterns is
here. You can find close-ups of the test patterns in it.
Contact
If you would like to use these test patterns at SPring-8, please contact:
Ryuta Mizutani, Dr.
Department of Applied Biochemistry, Tokai University
Kitakaname 4-1-1, Hiratsuka, Kanagawa 259-1292, Japan
E-mail mizutanilaboratory(at)gmail.com
Home -
publication -
movies/models -
MCTrace -
RecView
 -
test patterns
Our lab pages at GitHub /
YouTube
MizutaniLab -
Dept of Applied Biochemistry -
Sch of Engineering [jpn]
 -
Tokai Univ
 Material: aluminum wire, 0.25 mm diameter.
 Material: diamond, ca. 0.15 mm crystal.
 Material: aluminum rod, ca. 0.12 mm square.
 Material: aluminum wire, 0.10 mm diameter.